Table of Contents
Integrating LifterLMS with Fluent Form allows you to seamlessly connect your forms with your LifterLMS plugin and enroll students in specific courses based on the form submission.
You can purchase the LifterLMS addon for Fluent Forms here.
If you have already purchased the addon then follow these steps to set up the integration:
Step 1: Install the LifterLMS addon #
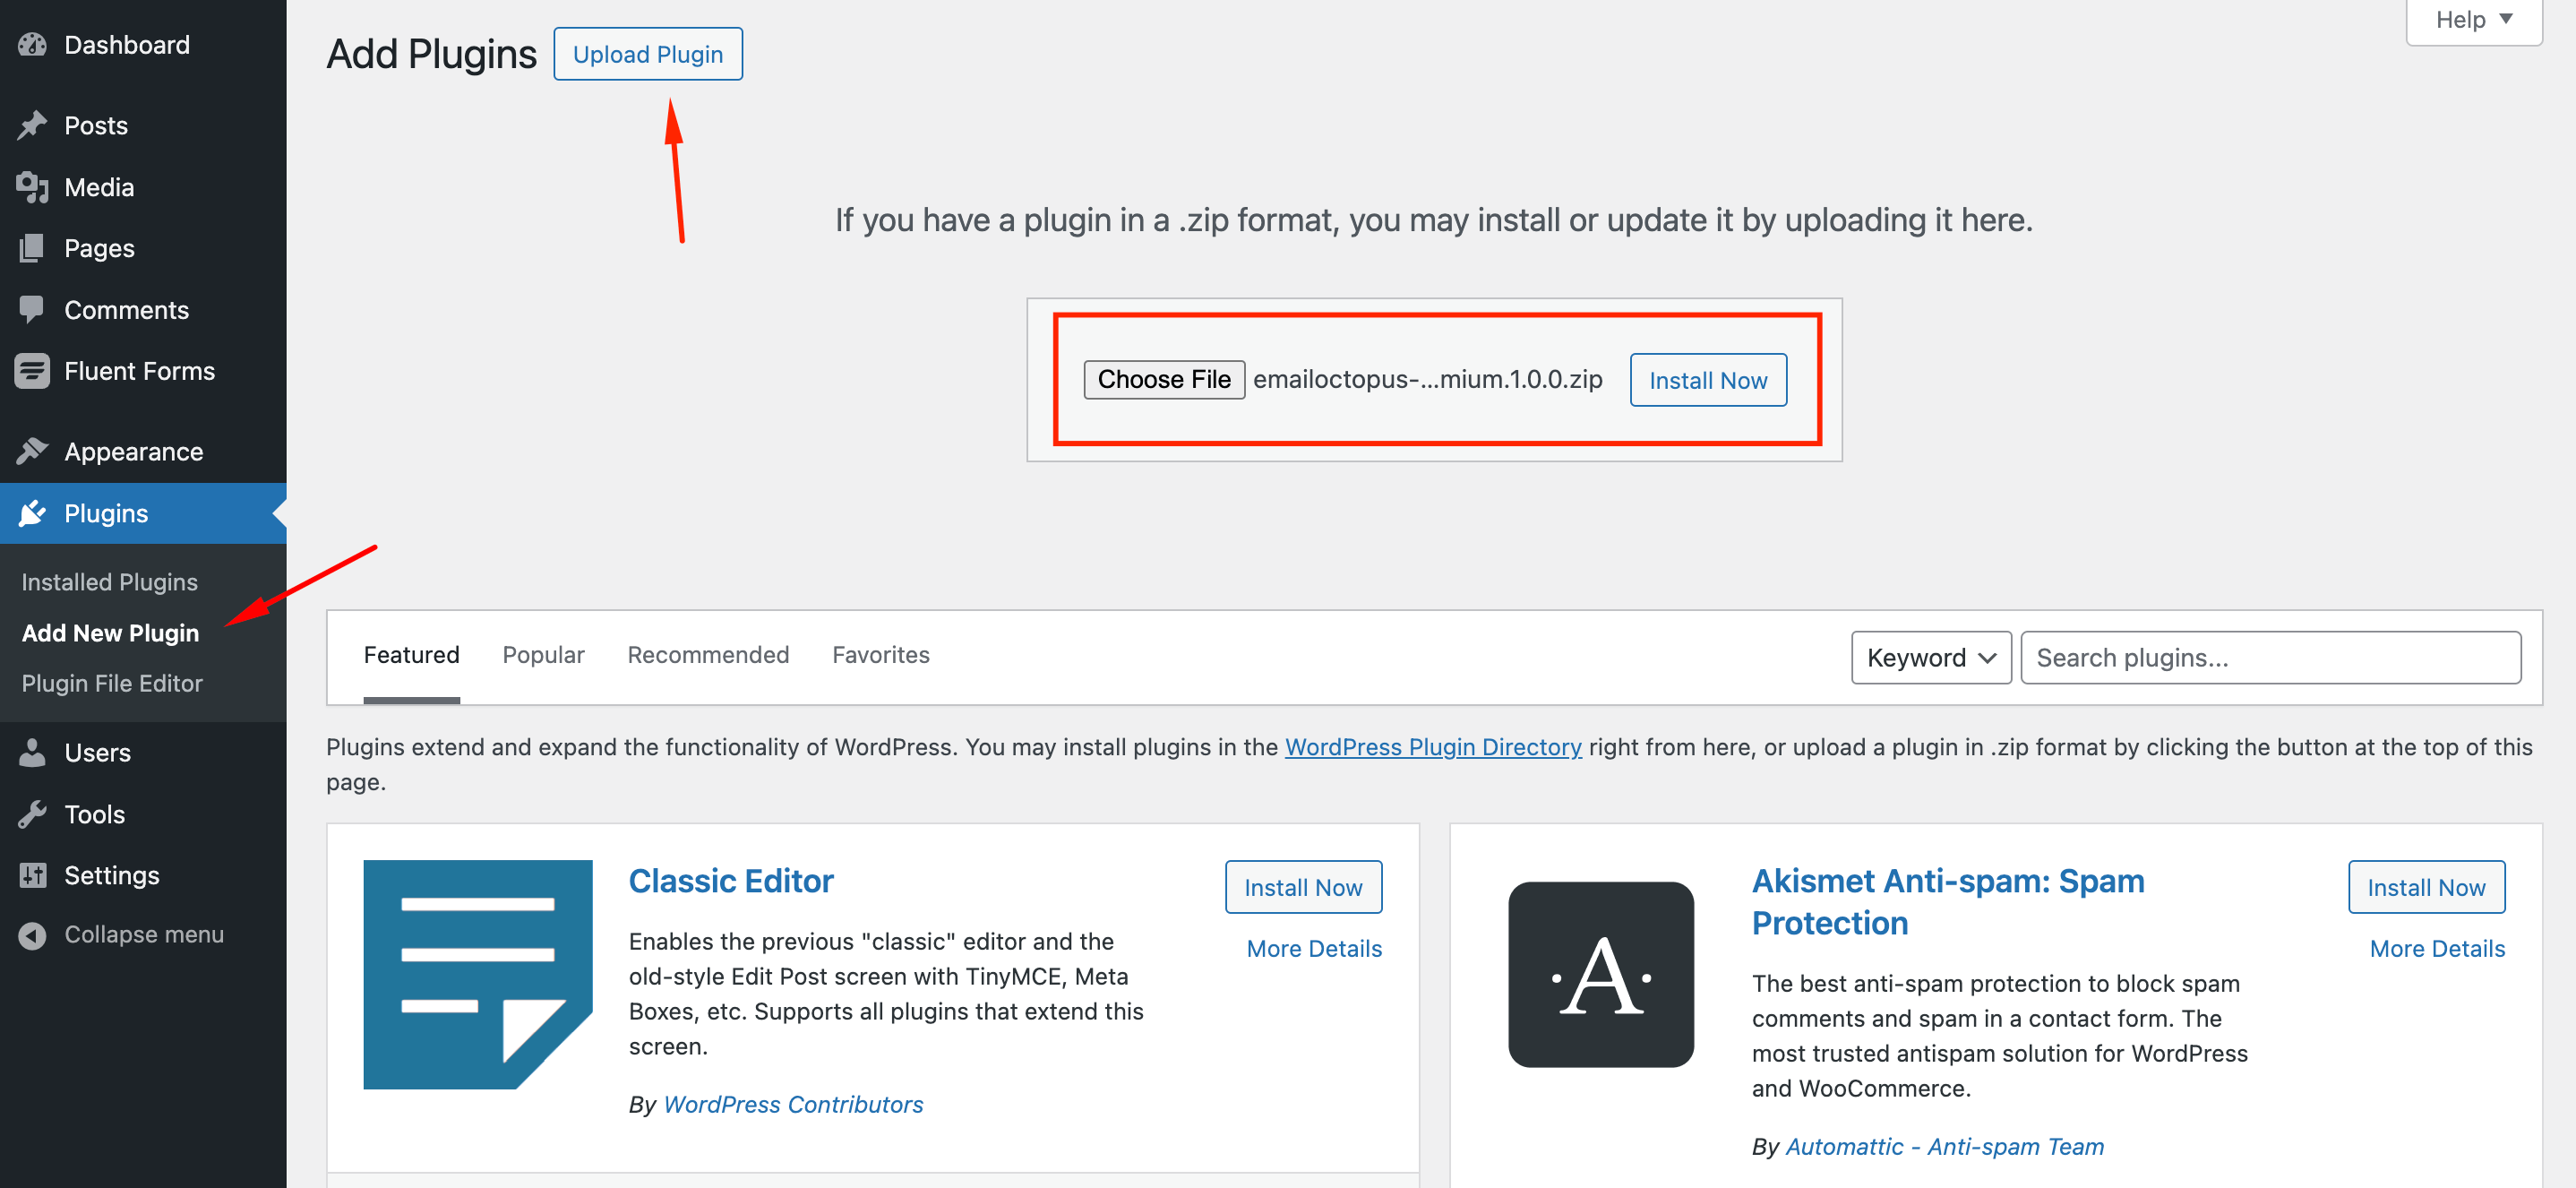
- Go to the Plugins directory and click on Add New Plugin.
- Click on the Upload Plugin button.
- Select the Zip file of the addon that you have received after purchasing the addon.
- Click Install Now.
Step 2: Install the License Key & Activate the LifterLMS Module #
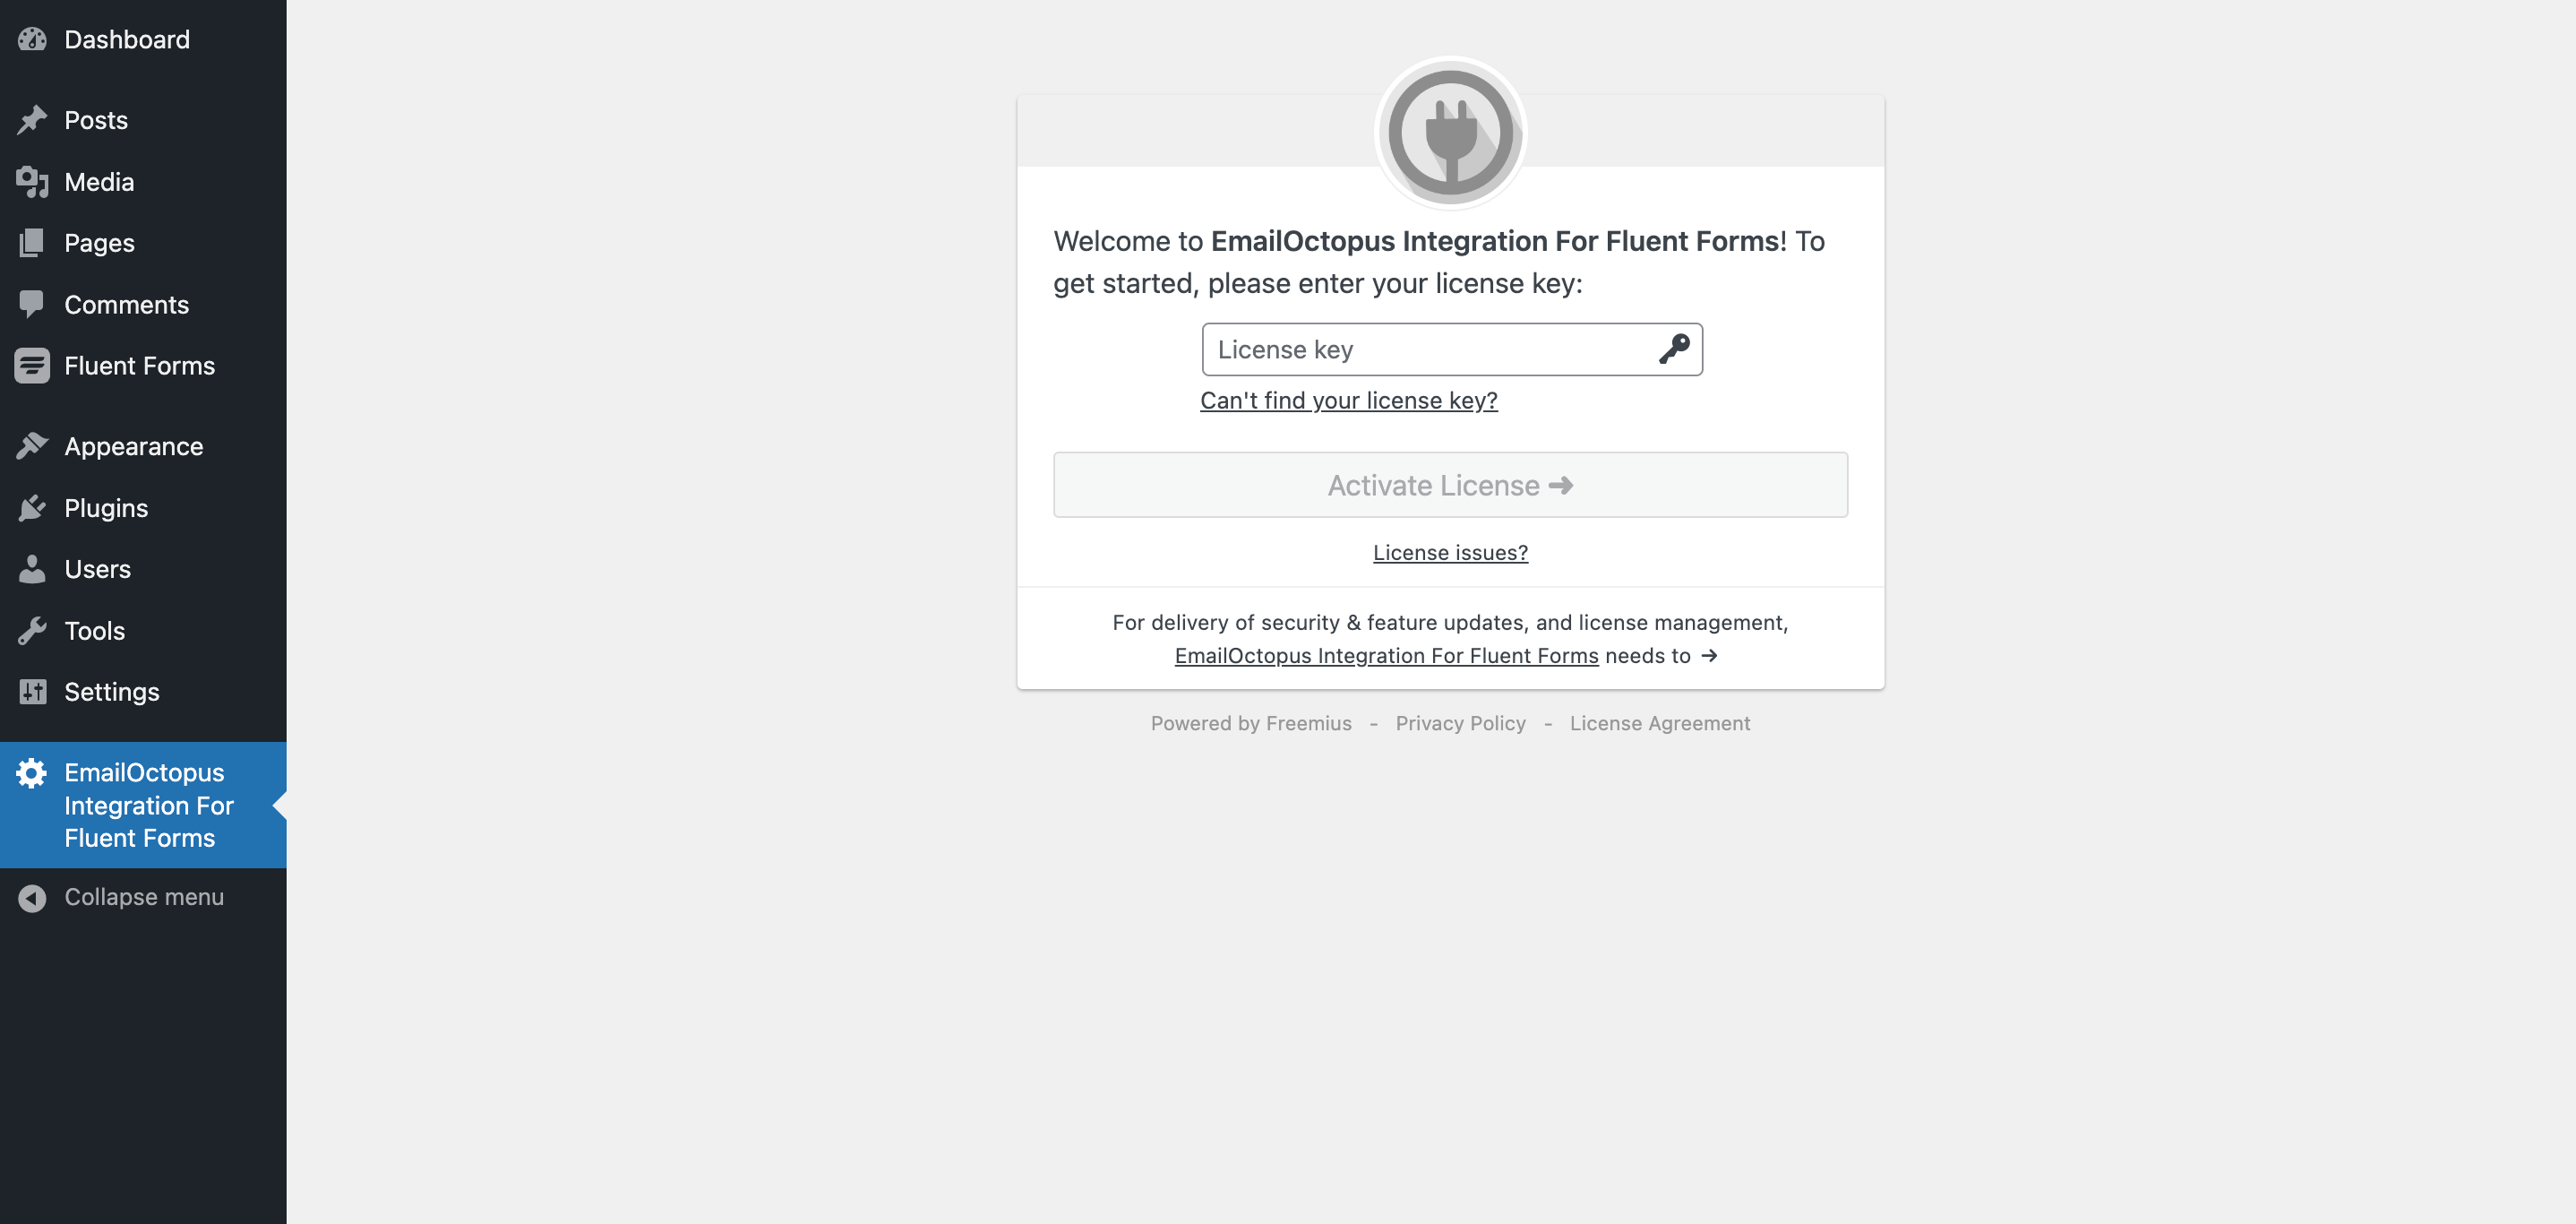
- After activating the plugin you will be redirected to a page where you can add the license key. If you are not automatically redirected to the license page, you can also manually navigate to the page from – Fluent Forms → Integrations → LifterLMS Addon
- Also, make sure the LifterLMS module is enabled in the Fluent Forms Integration Modules.
Step 3: Retrieve the API Key from EmailOctopus #
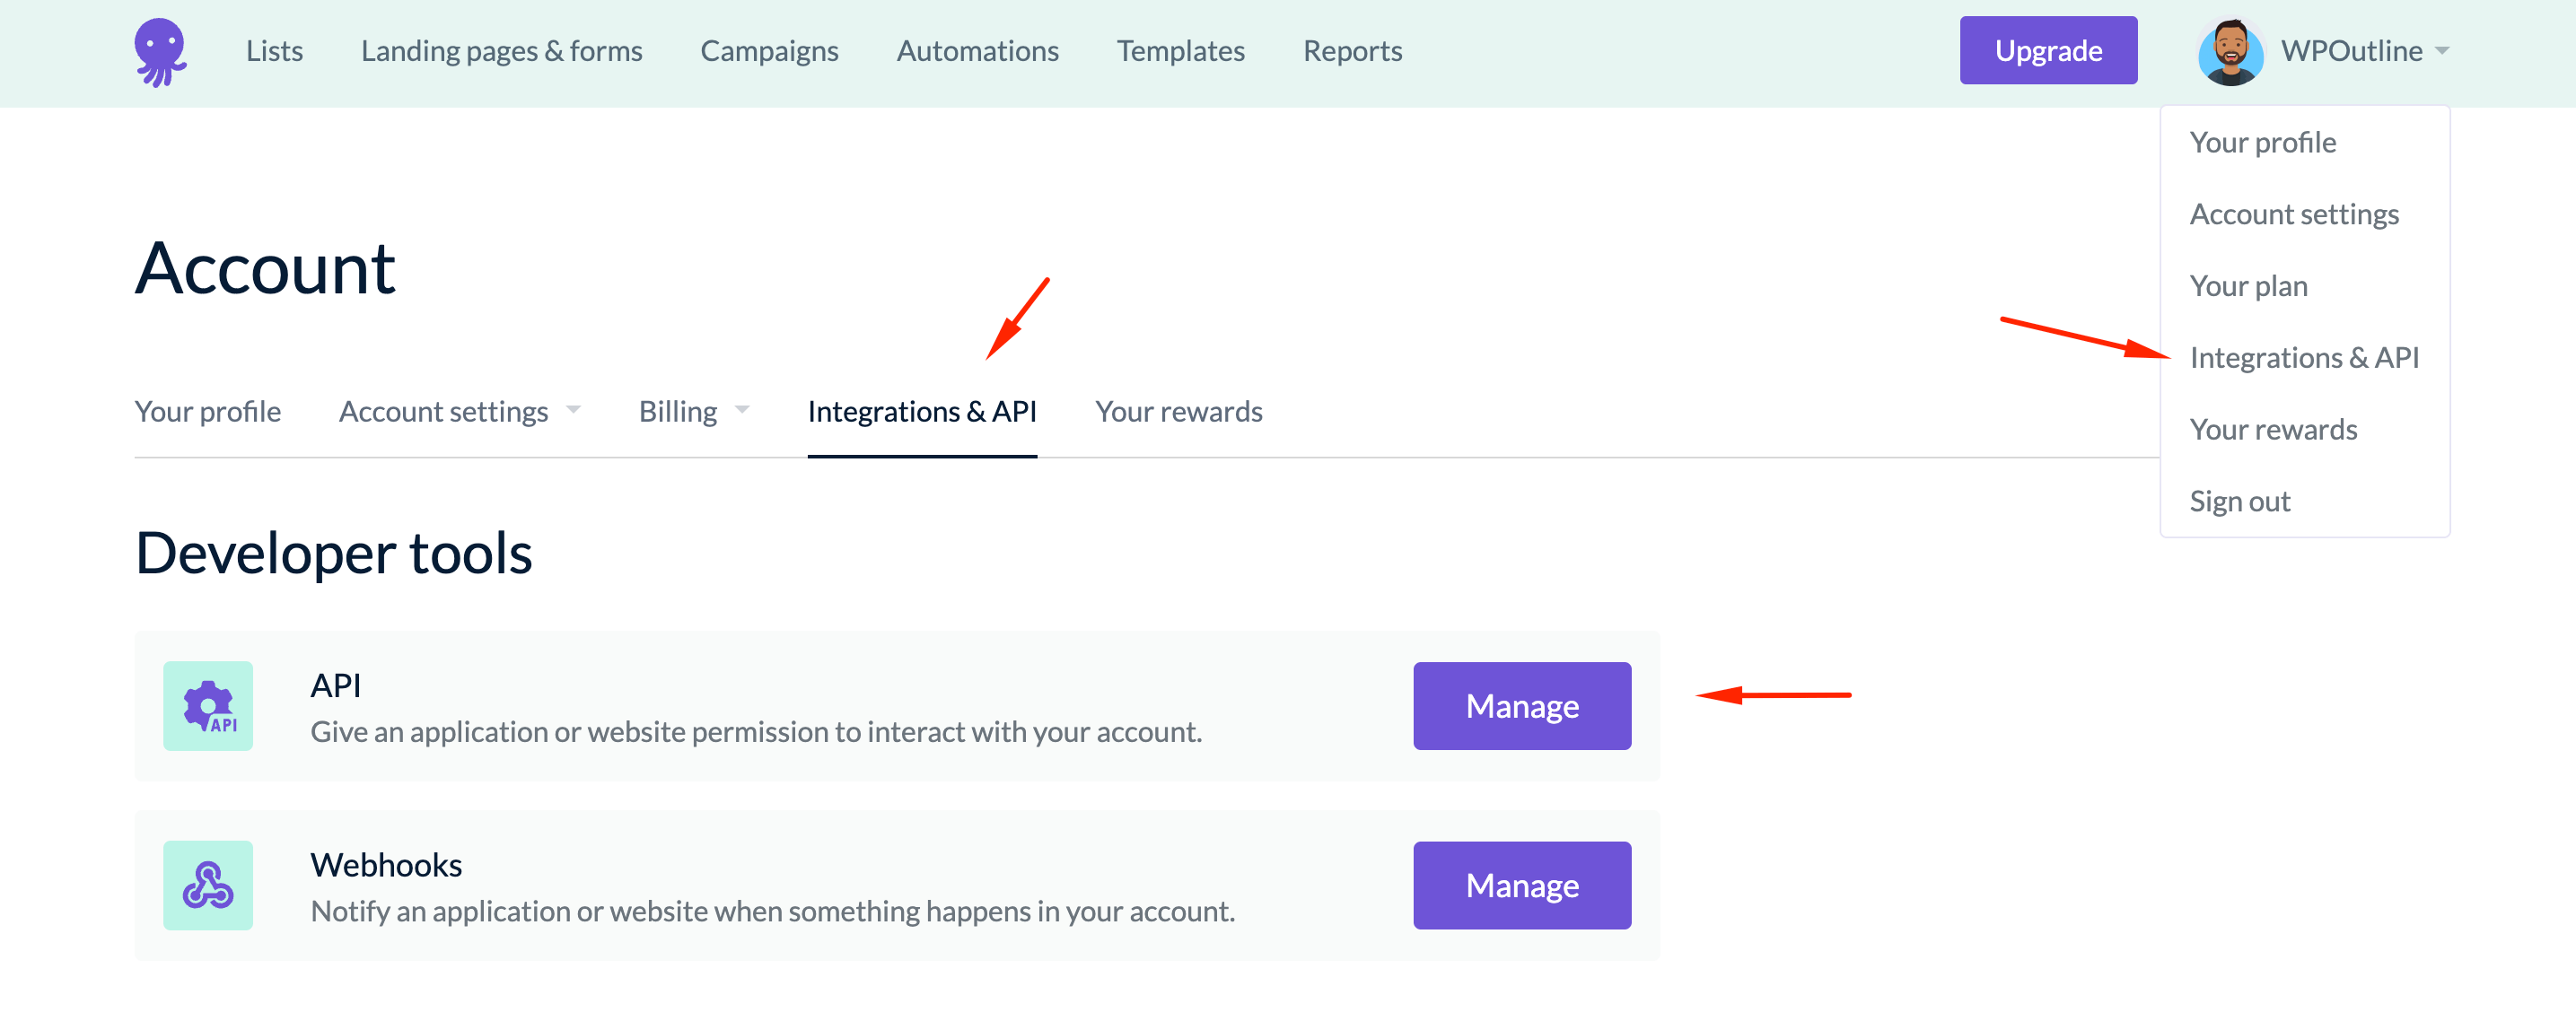
- Log in to your EmailOctopus account.
- Go to the API section under Account Settings.
- Create a new API key.
- Copy your API key.
Step 4: Configure LifterLMS Settings in Fluent Forms #
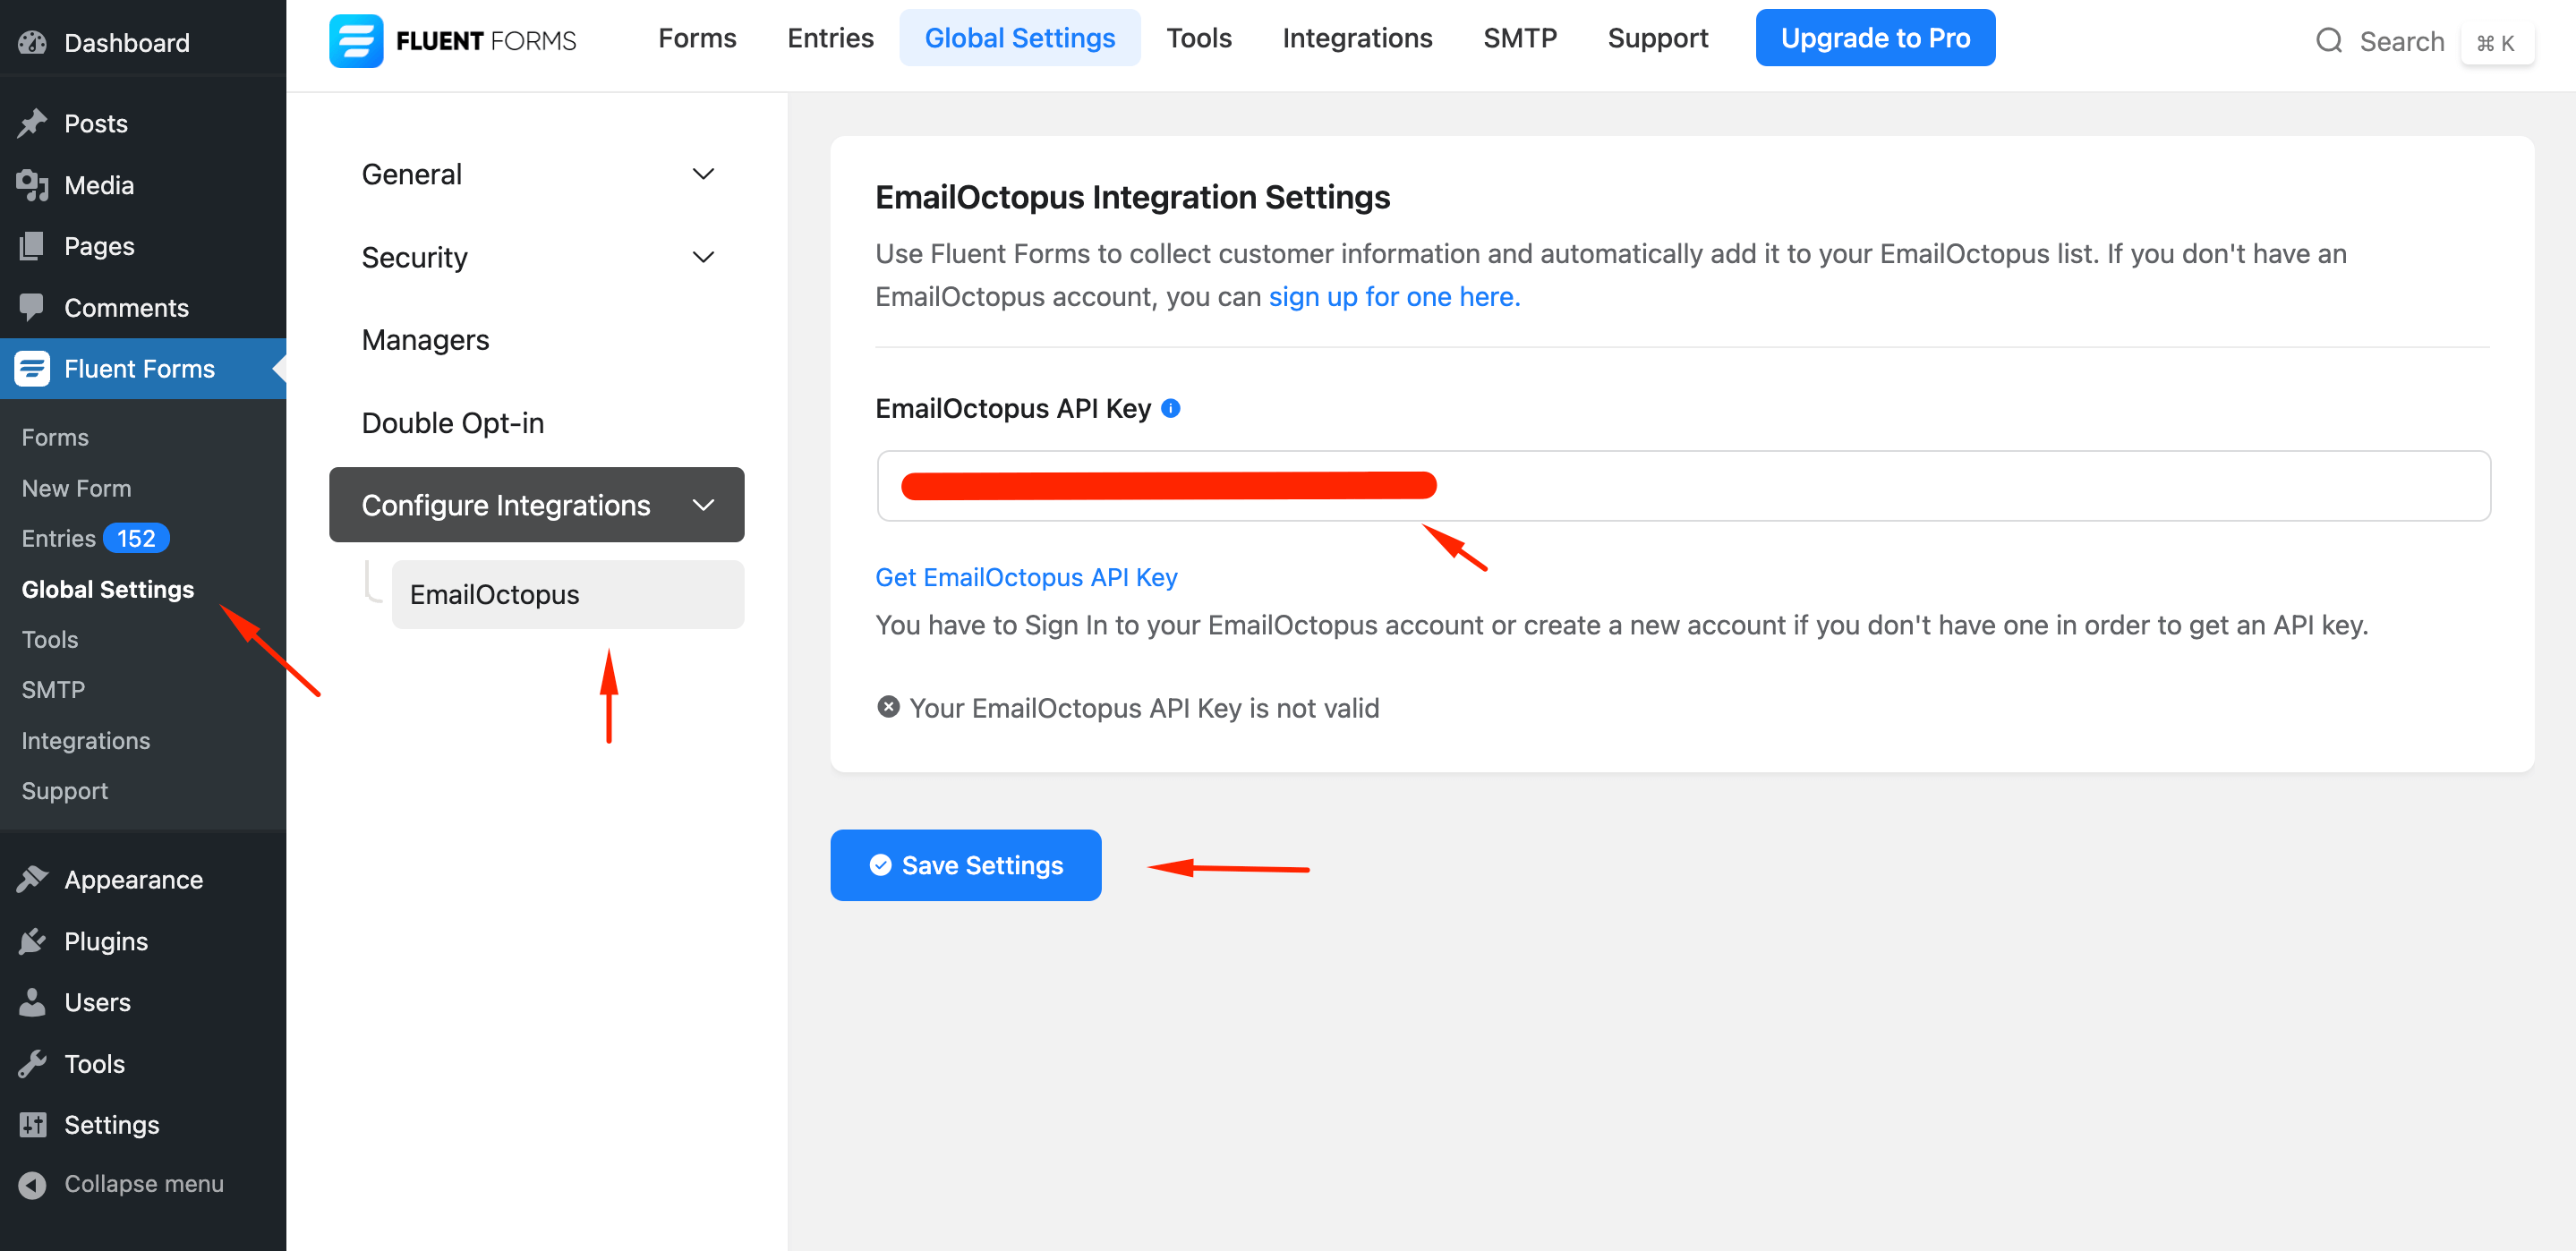
- Return to the Fluent Forms dashboard.
- Go to Global Settings.
- Select LifterLMS from the Configure integrations list.
- Enter your API key and save the settings.
Step 5: Add a new Integration Feed #
- Go to the Forms section in Fluent Forms.
- Create a new form or select an existing form.
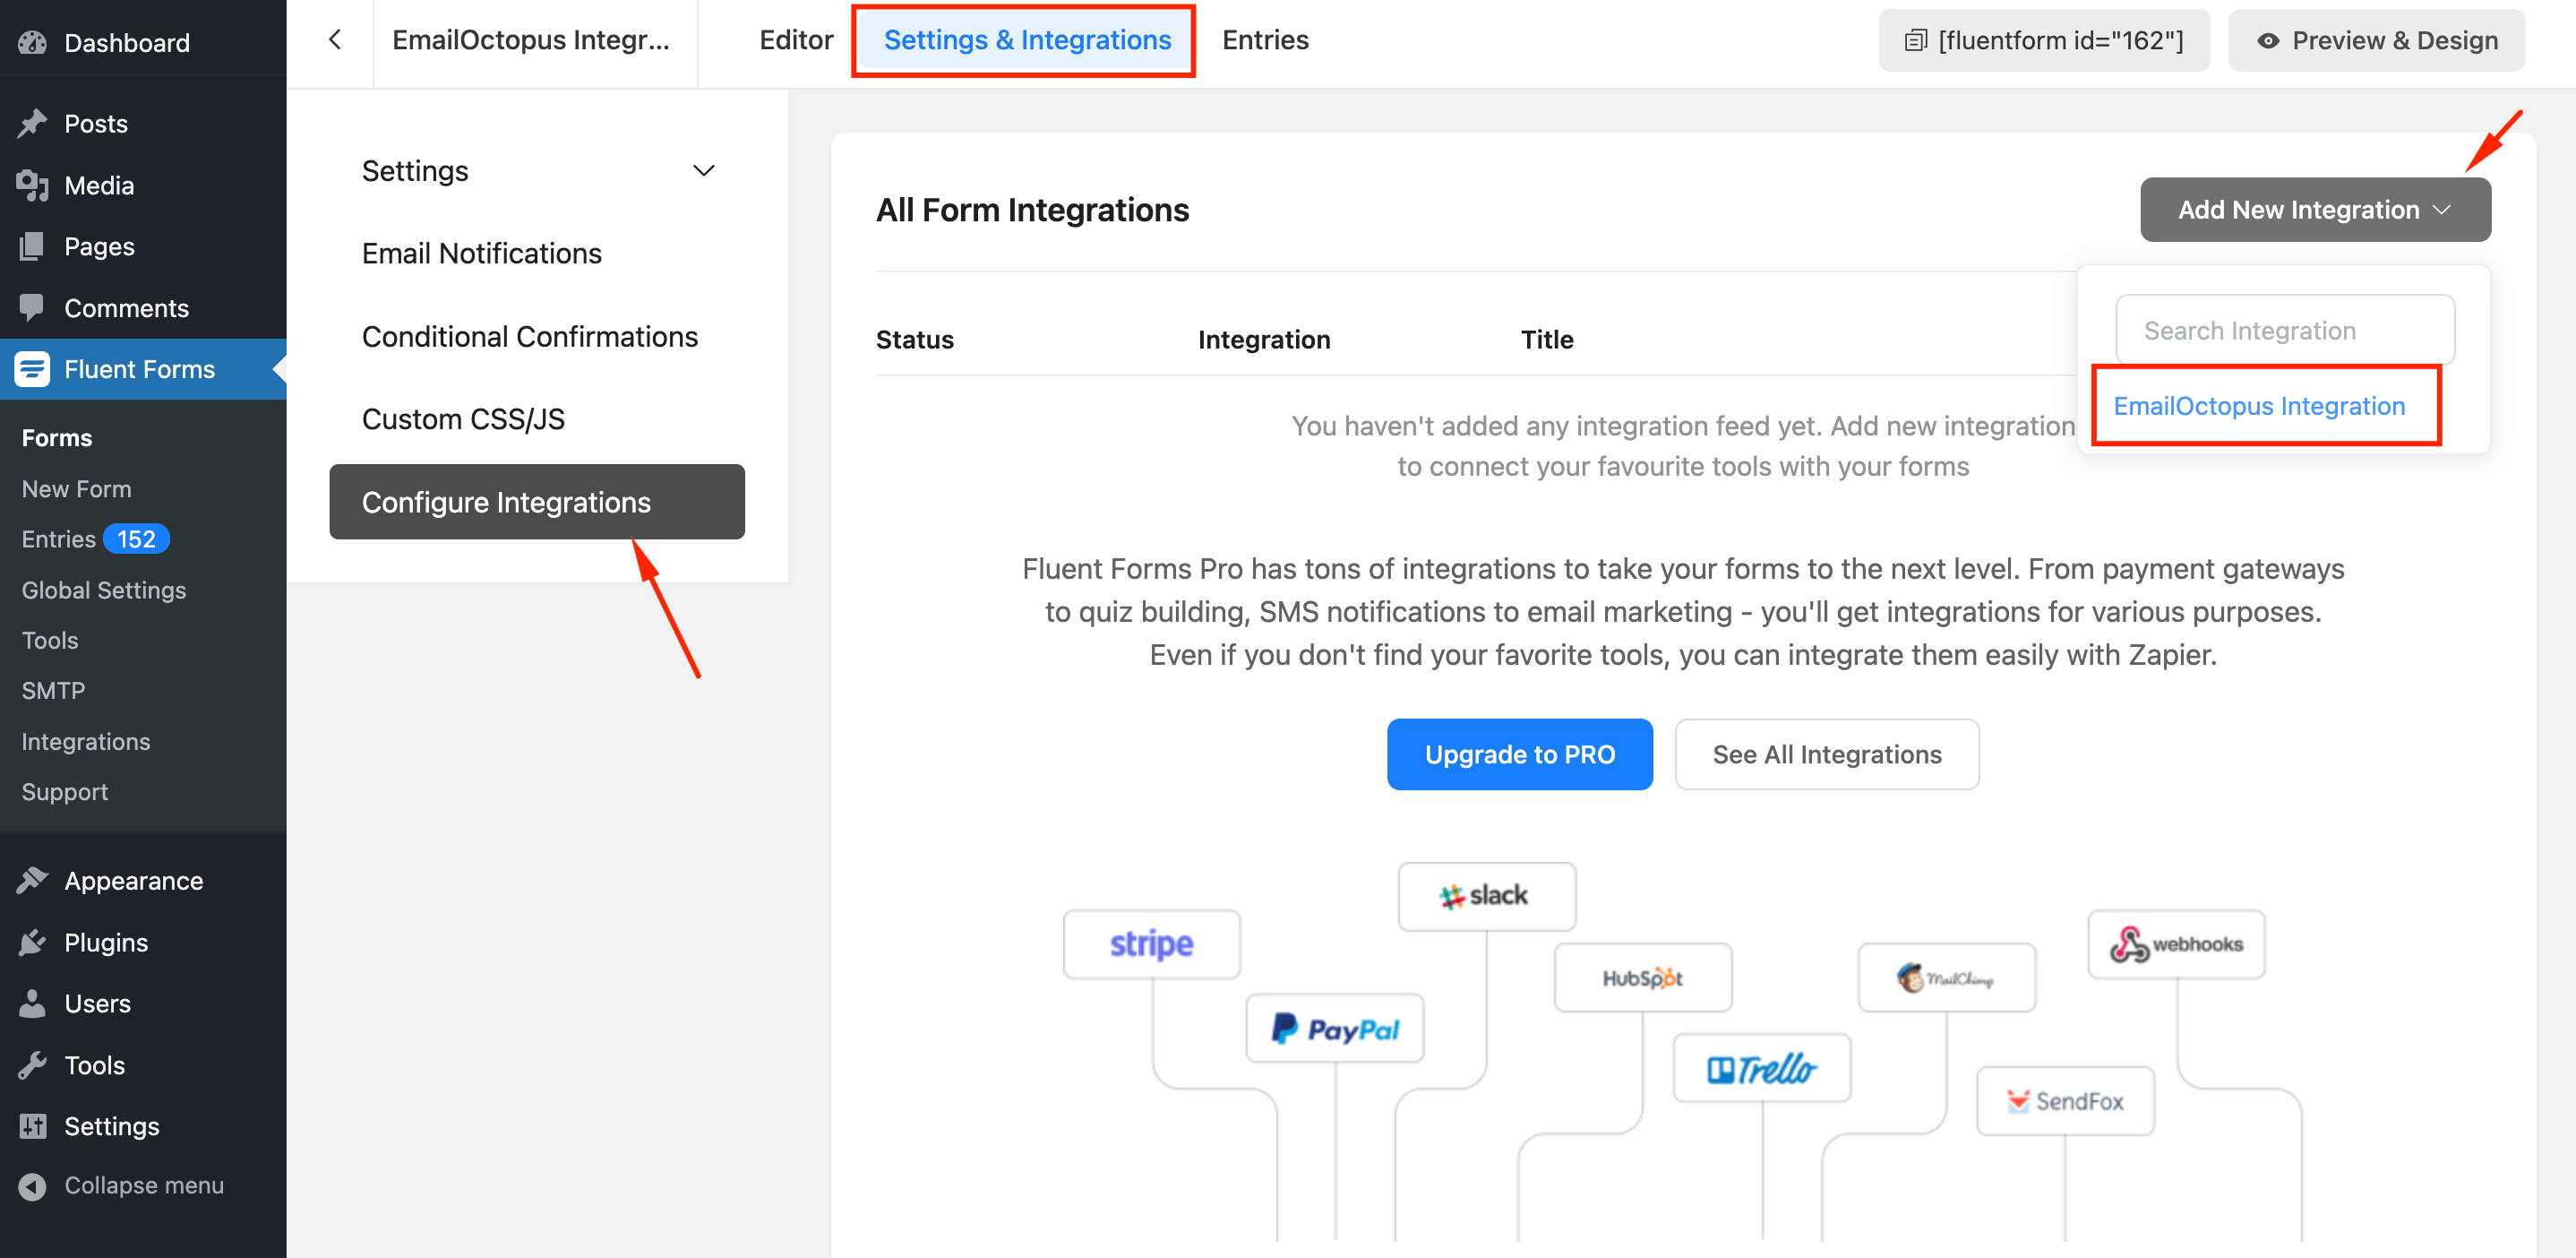
- In the form editor, navigate to Marketing & CRM Integrations.
- Click on Add New Integration.
- Select EmailOctopus from the list.
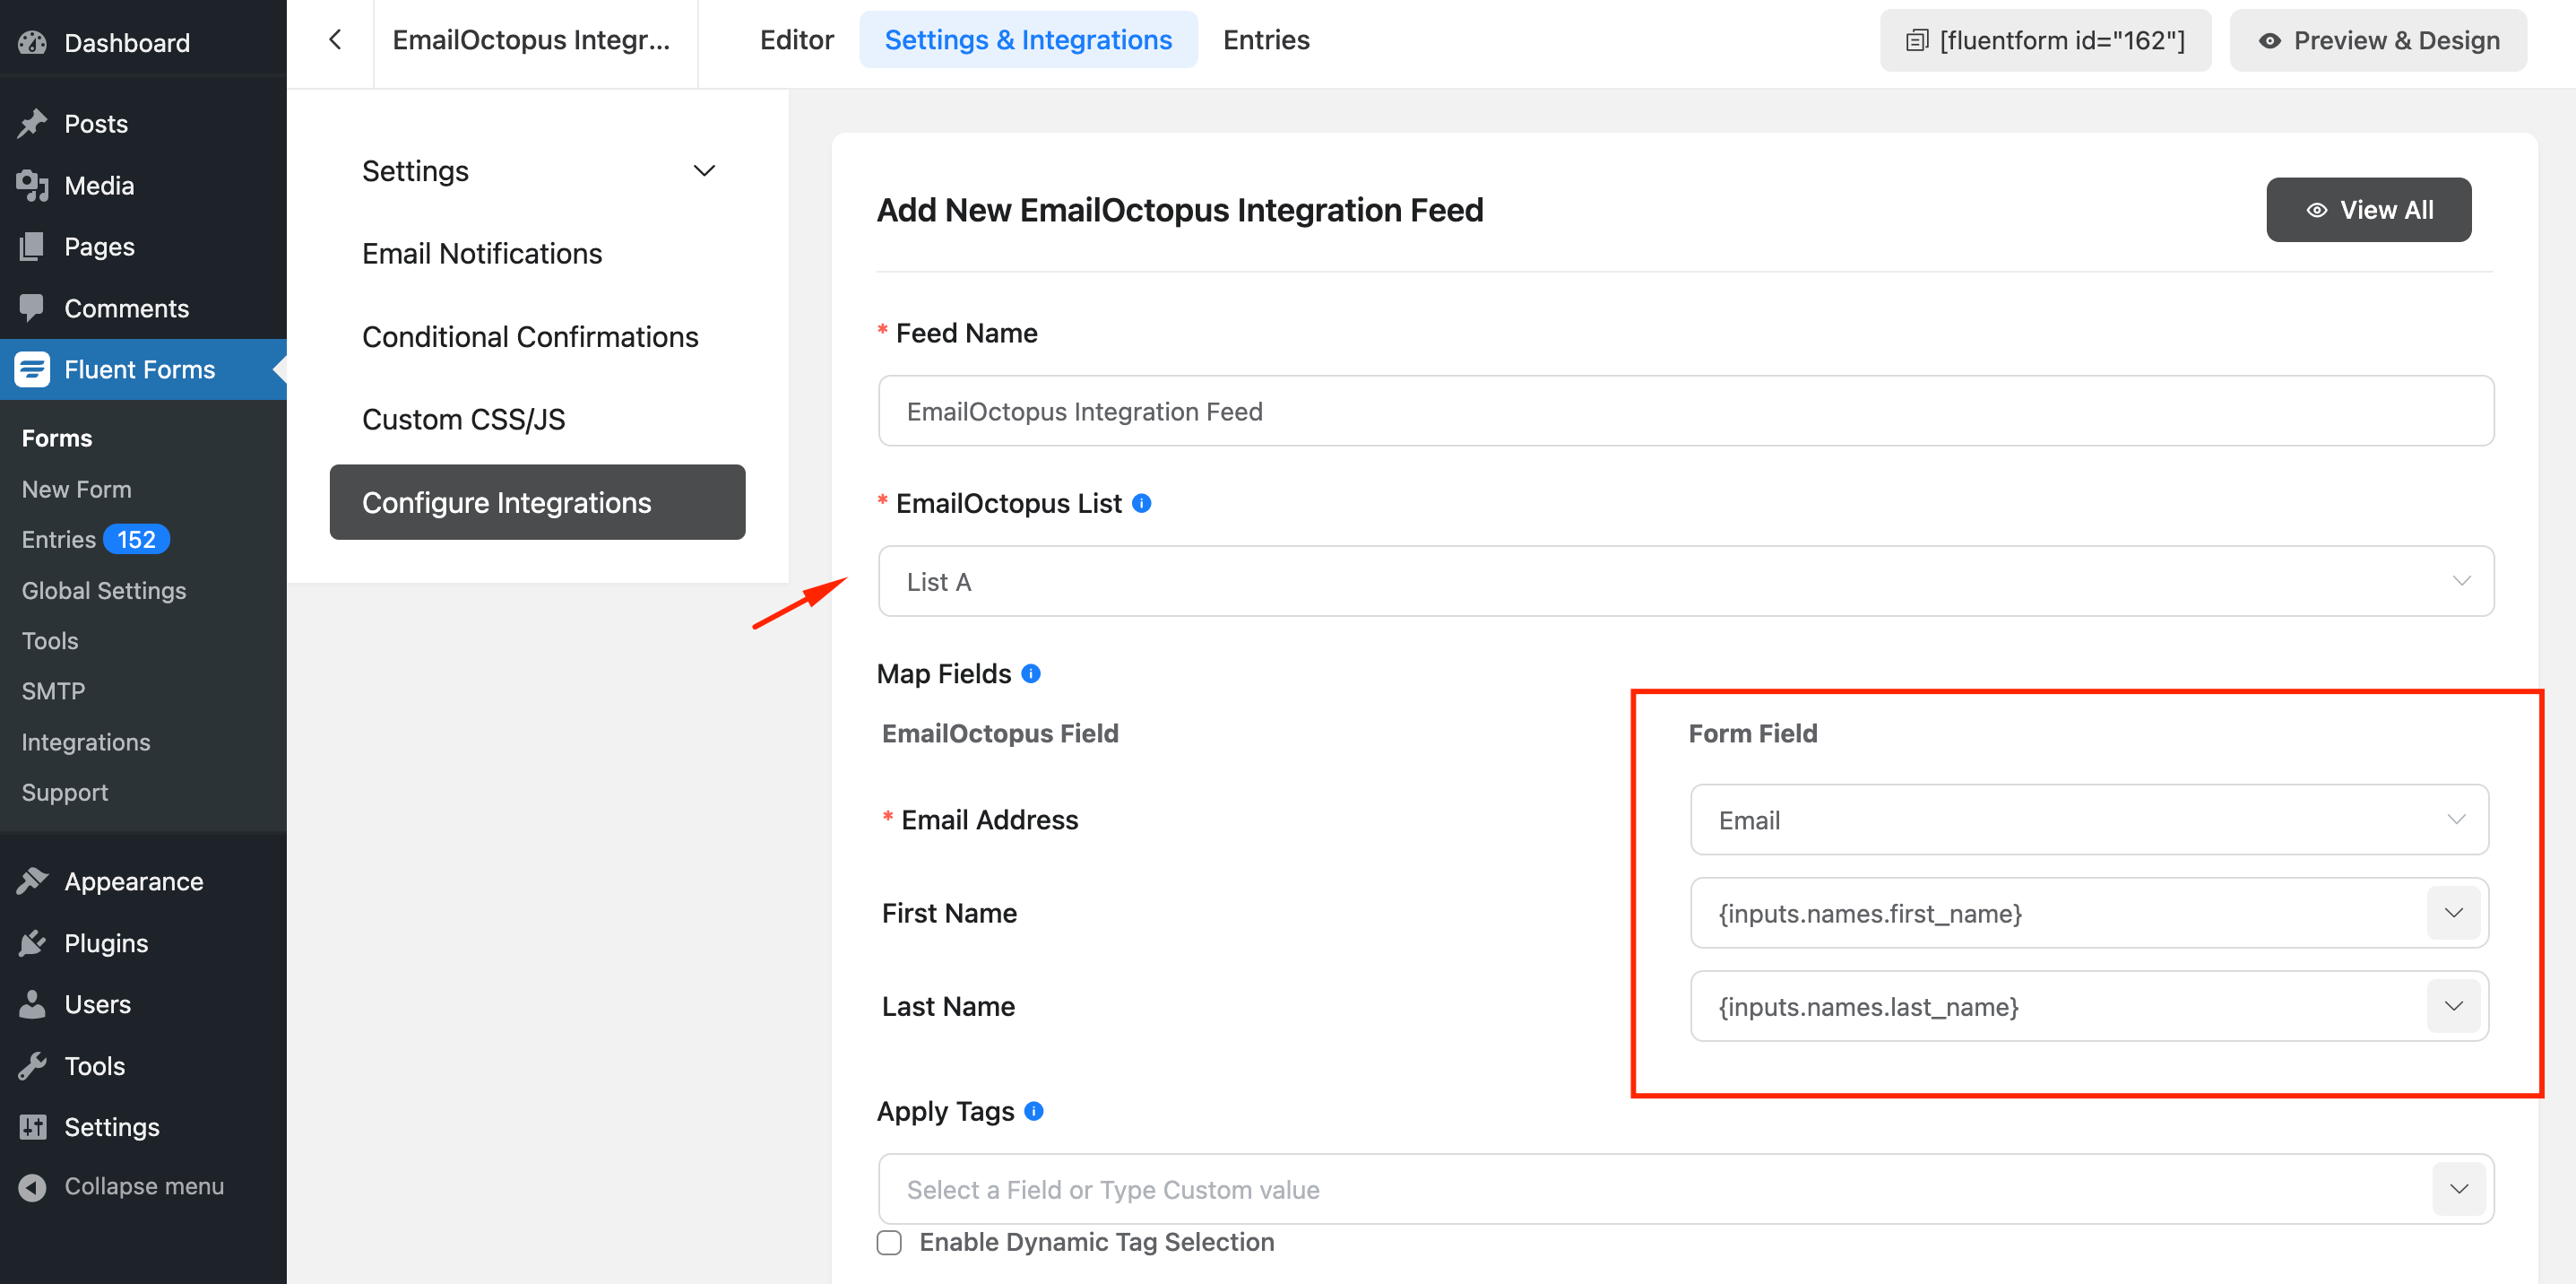
Step 6: Setup the Integration Feed #
- Map your form fields to the corresponding EmailOctopus fields.
- Configure additional options like double opt-in and tags.
- Set up any conditional logic if needed to control when the data is sent to EmailOctopus. To use conditional logic you would need the Pro version of Fluent Forms.
- Save the settings.
Step 7: Test the Integration #
- Submit a test entry to ensure the data is correctly sent to EmailOctopus.
- Verify the data appears in your EmailOctopus account.
By following these steps, you can integrate EmailOctopus with Fluent Forms and streamline your email marketing efforts.
If you have any questions or if you need any additional help, then feel free to reach out to us here.


